Green Reed

I tried an experiment last week involving a Green Reed for Contraforte. I just harvested some cane in early January and decided to try to immediately make a reed out of it instead of letting it dry. And this is what turned out! I regular reed that sounded and acted like any other reed but it was fresh green cane and didnt need to be soaked in water before I played on it. The texture was similar to a very hard piece of cane so I had to make this thinner than I would normally. After a few days it started to dry out and warp and is now is playing very sharp. Next I’m going to try this on regular bassoon.

I would suggest trying it to all of the cane harvesters out there!

This is a post that I have dreaded doing for a long time. I debated whether this was necessary and useful to people, or if it would just be obnoxious. I realized that when I myself was buying reed tools there was very little information on a consumer level about how these machines stacked up against each other. If I was starting all over again in buying reed machines, I would have liked to have seen more information about them. So that’s the basis of including this aspect of my reed desk equipment.


Reiger Bassoon Gouger

Reiger bassoon gouger
bassoon gouger


Reiger Bassoon Gouger
bassoon gouger

This gouger was a recent acquisition, it was a graduation gift from my uncle. Outside of this gouger I have only used the Reeds ‘n Stuff gouger, and I do really prefer the Reiger. The guillotine (which is included, and a big reason for choosing this machine) is very easy to use and cuts to a perfect fit to the cane bed. Once the cane is at that 120mm length, it fits right into the cane bed and never slips out. I have had some problems with other gougers where the cane jumps off of the machine once you use a little strength.

www.georgrieger.com


Berdon Bassoon Profile

Berdon Profiler
bassoon profiler


Berdon Profiler
bassoon profiler

This machine is an ANTIQUE! It is very old and I found it on eBay from an oboe player who had it in his closet for a few decades. This machine represents a very simple single barrel profiler with two basic adjustment screws, a removable blade, and no measurement systems whatsoever. There are many simple machines like this still being done by a few companies. What I like is that it is very easy to use, easy to remove the blade to sharpen myself and easy to adjust. I don’t like that when I adjust the profile I have to waste a few pieces of cane on trial and error experiments with no way of knowing what my current settings are. I found this for $300 and it works great, if you can find a cheap simple profiler you can probably get a good blade fit to it and get it working. Otherwise I would suggest finding something newer and more sophisticated.


Reeds ‘n Stuff Tip Profiler

tip profiler
bassoon tip profiler
tip profiler
bassoon tip profiler

This tip profiler I also found used. This is the only thing that I own by Reeds ‘n Stuff and I’m quite sure that he now makes a fancier version of this. However this is very similar to the Reiger tip profiler and it makes all reed finishing a dream. Every tip is the same every time. I cannot enough stress how much this machine changed my reed making and my consistency of sound. I know that they also make oboe tip profilers, that is most of what I hear oboe reed makers complain about is creating an even tip. I have also had some luck using this with contrabassoon reeds without even having to adjust it. If I just put the reed on and keep it a few millimeters shy of the guideline, I get a great tip.

www.reedsnstuff.com


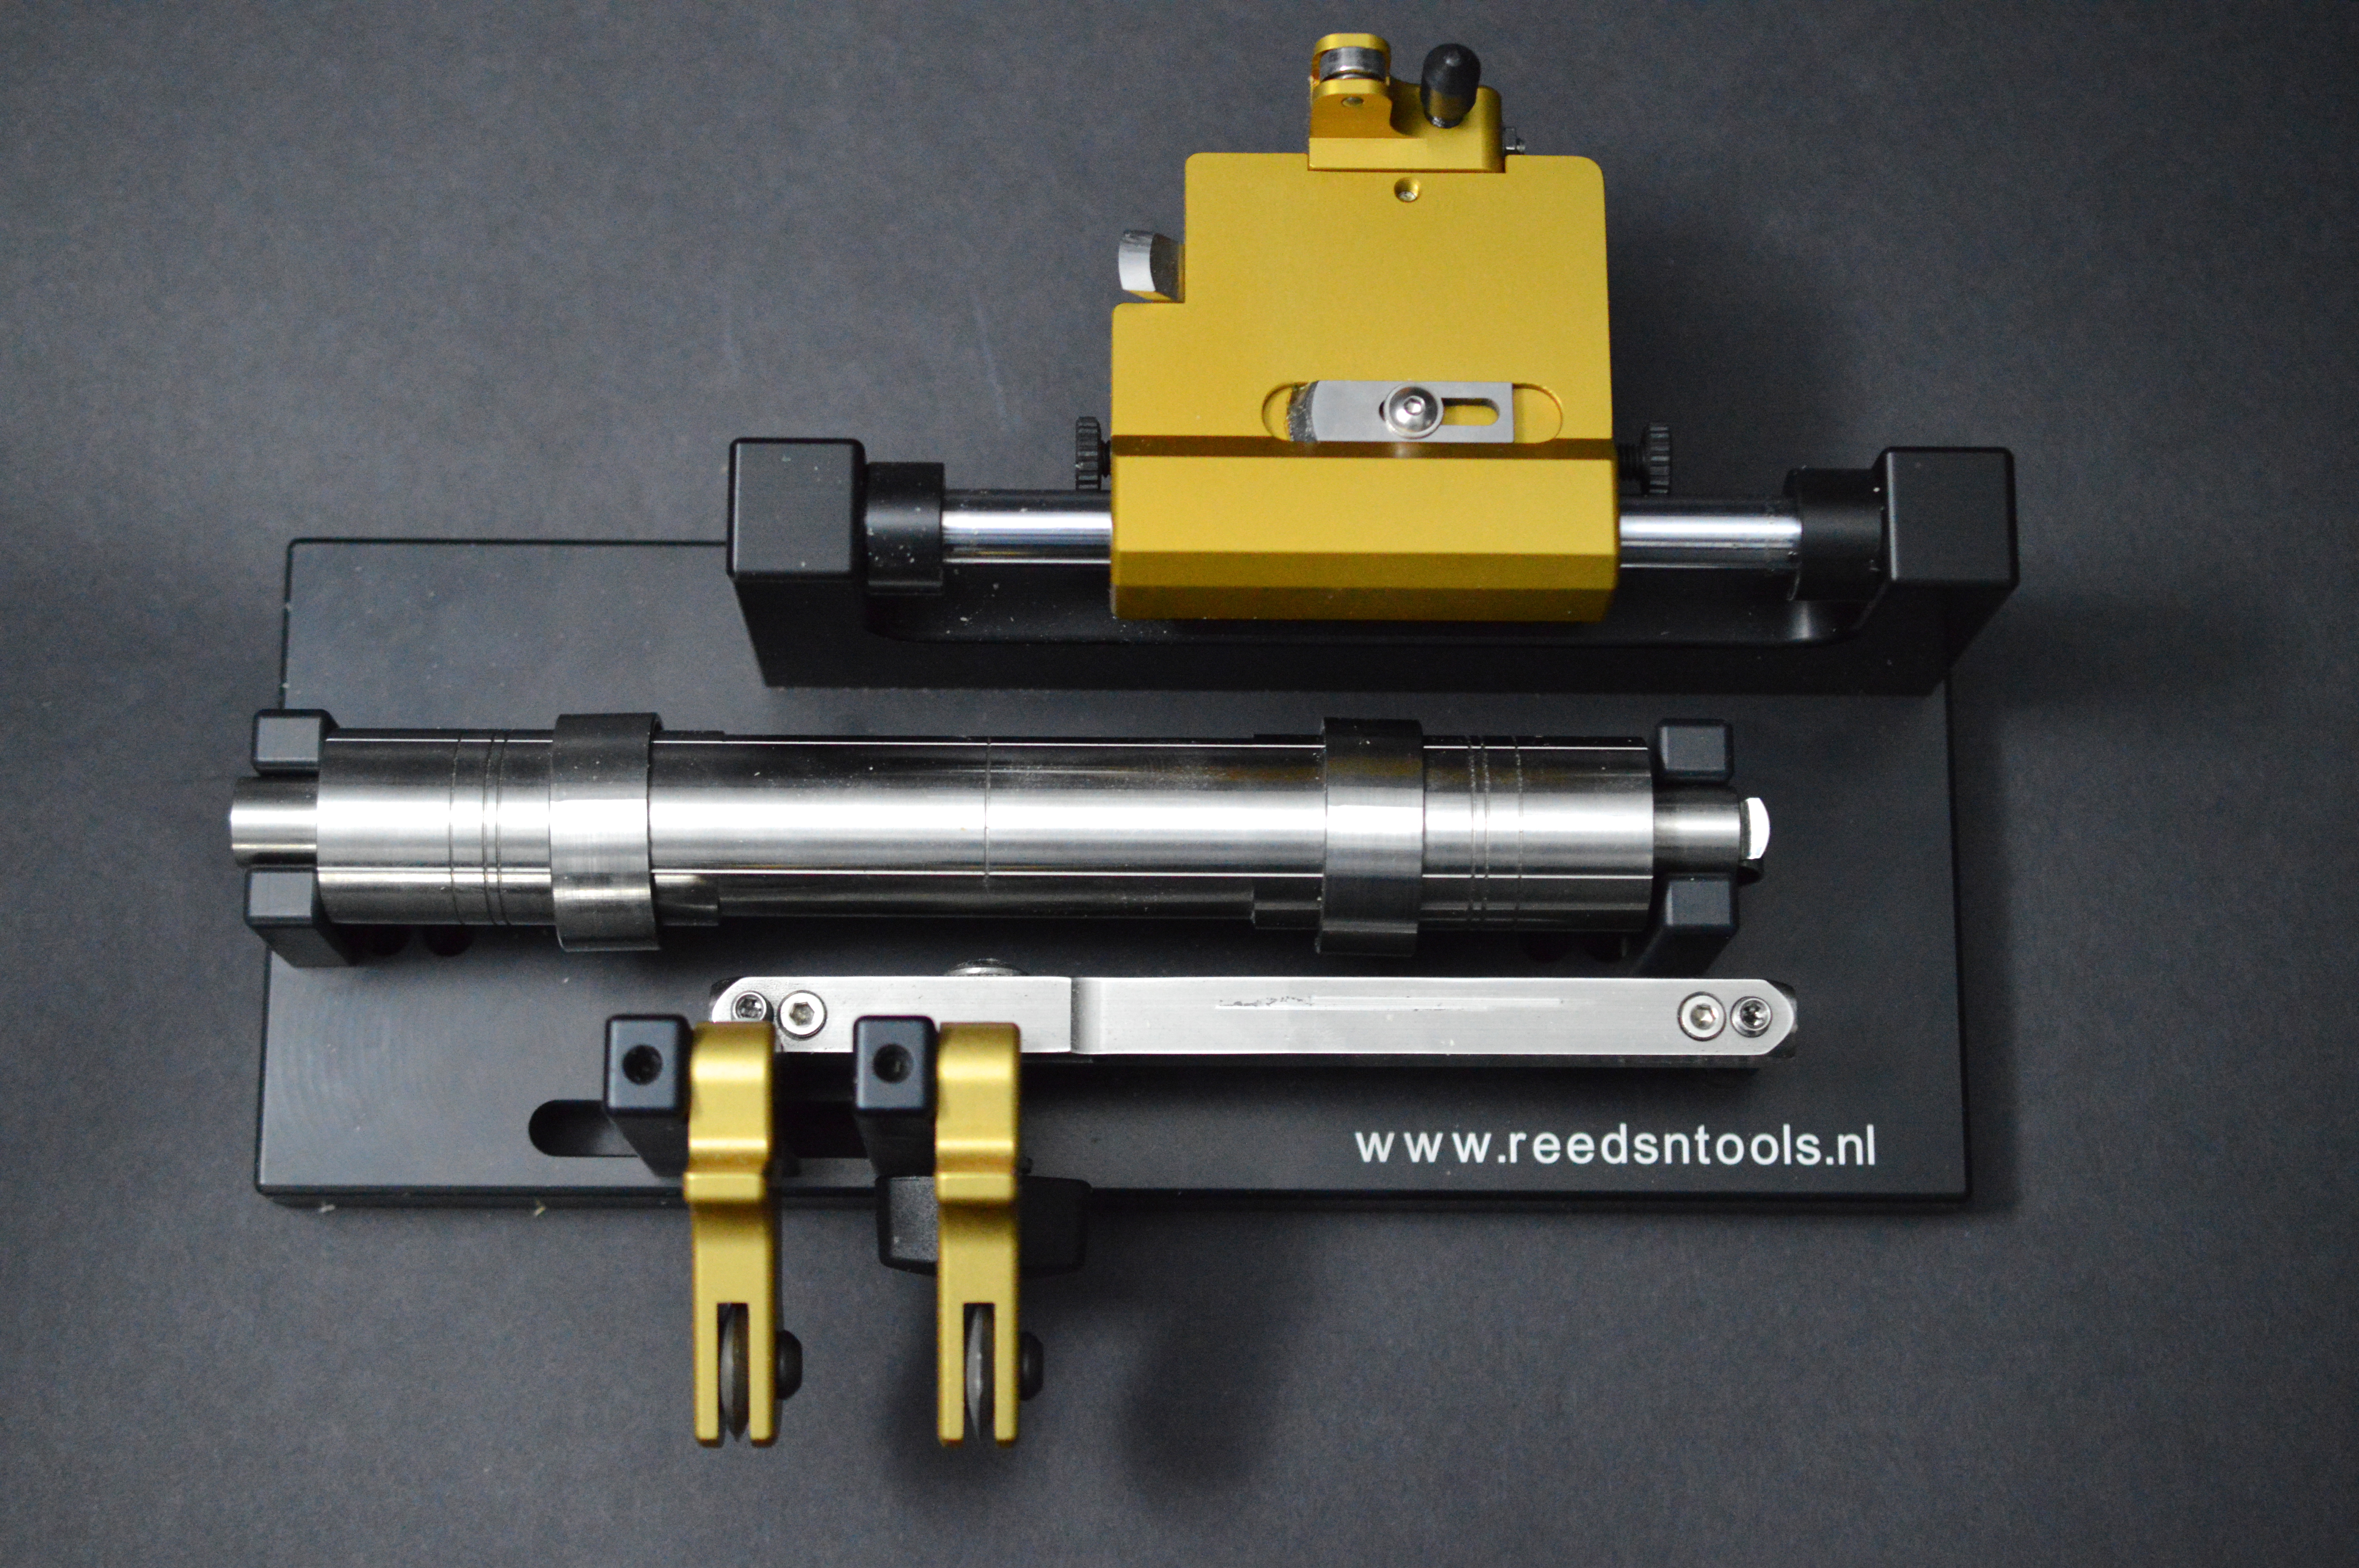
Reeds & Tools gouger

Contra Gouger
contrabassoon contraforte gouger


contra gouger
contrabassoon contraforte gouger


These Reeds & Tools machines are my newest additions, just over a month old. They represent the fanciest machines with flexibility and technology and controlled results. The gouger I currently have set up for processing contraforte cane, this means that I am using a 160mm long 30mm diameter cane bed with a 30mm diameter blade. The cane beds on this machine are interchangeable, so I also have a contrabassoon length bed (150mm) that I can slide use. I also have a 28mm diameter blade and carriage If I want to have eccentrically gouged cane instead of concentric. This machine can also fit a bassoon cane bed, so for doublers who only want one machine to process both instruments’ cane this may be a good choice. Again the guillotine has been great and the bed hold cane firmly.

gouged contra cane

This is an example of the gouge from this machine.


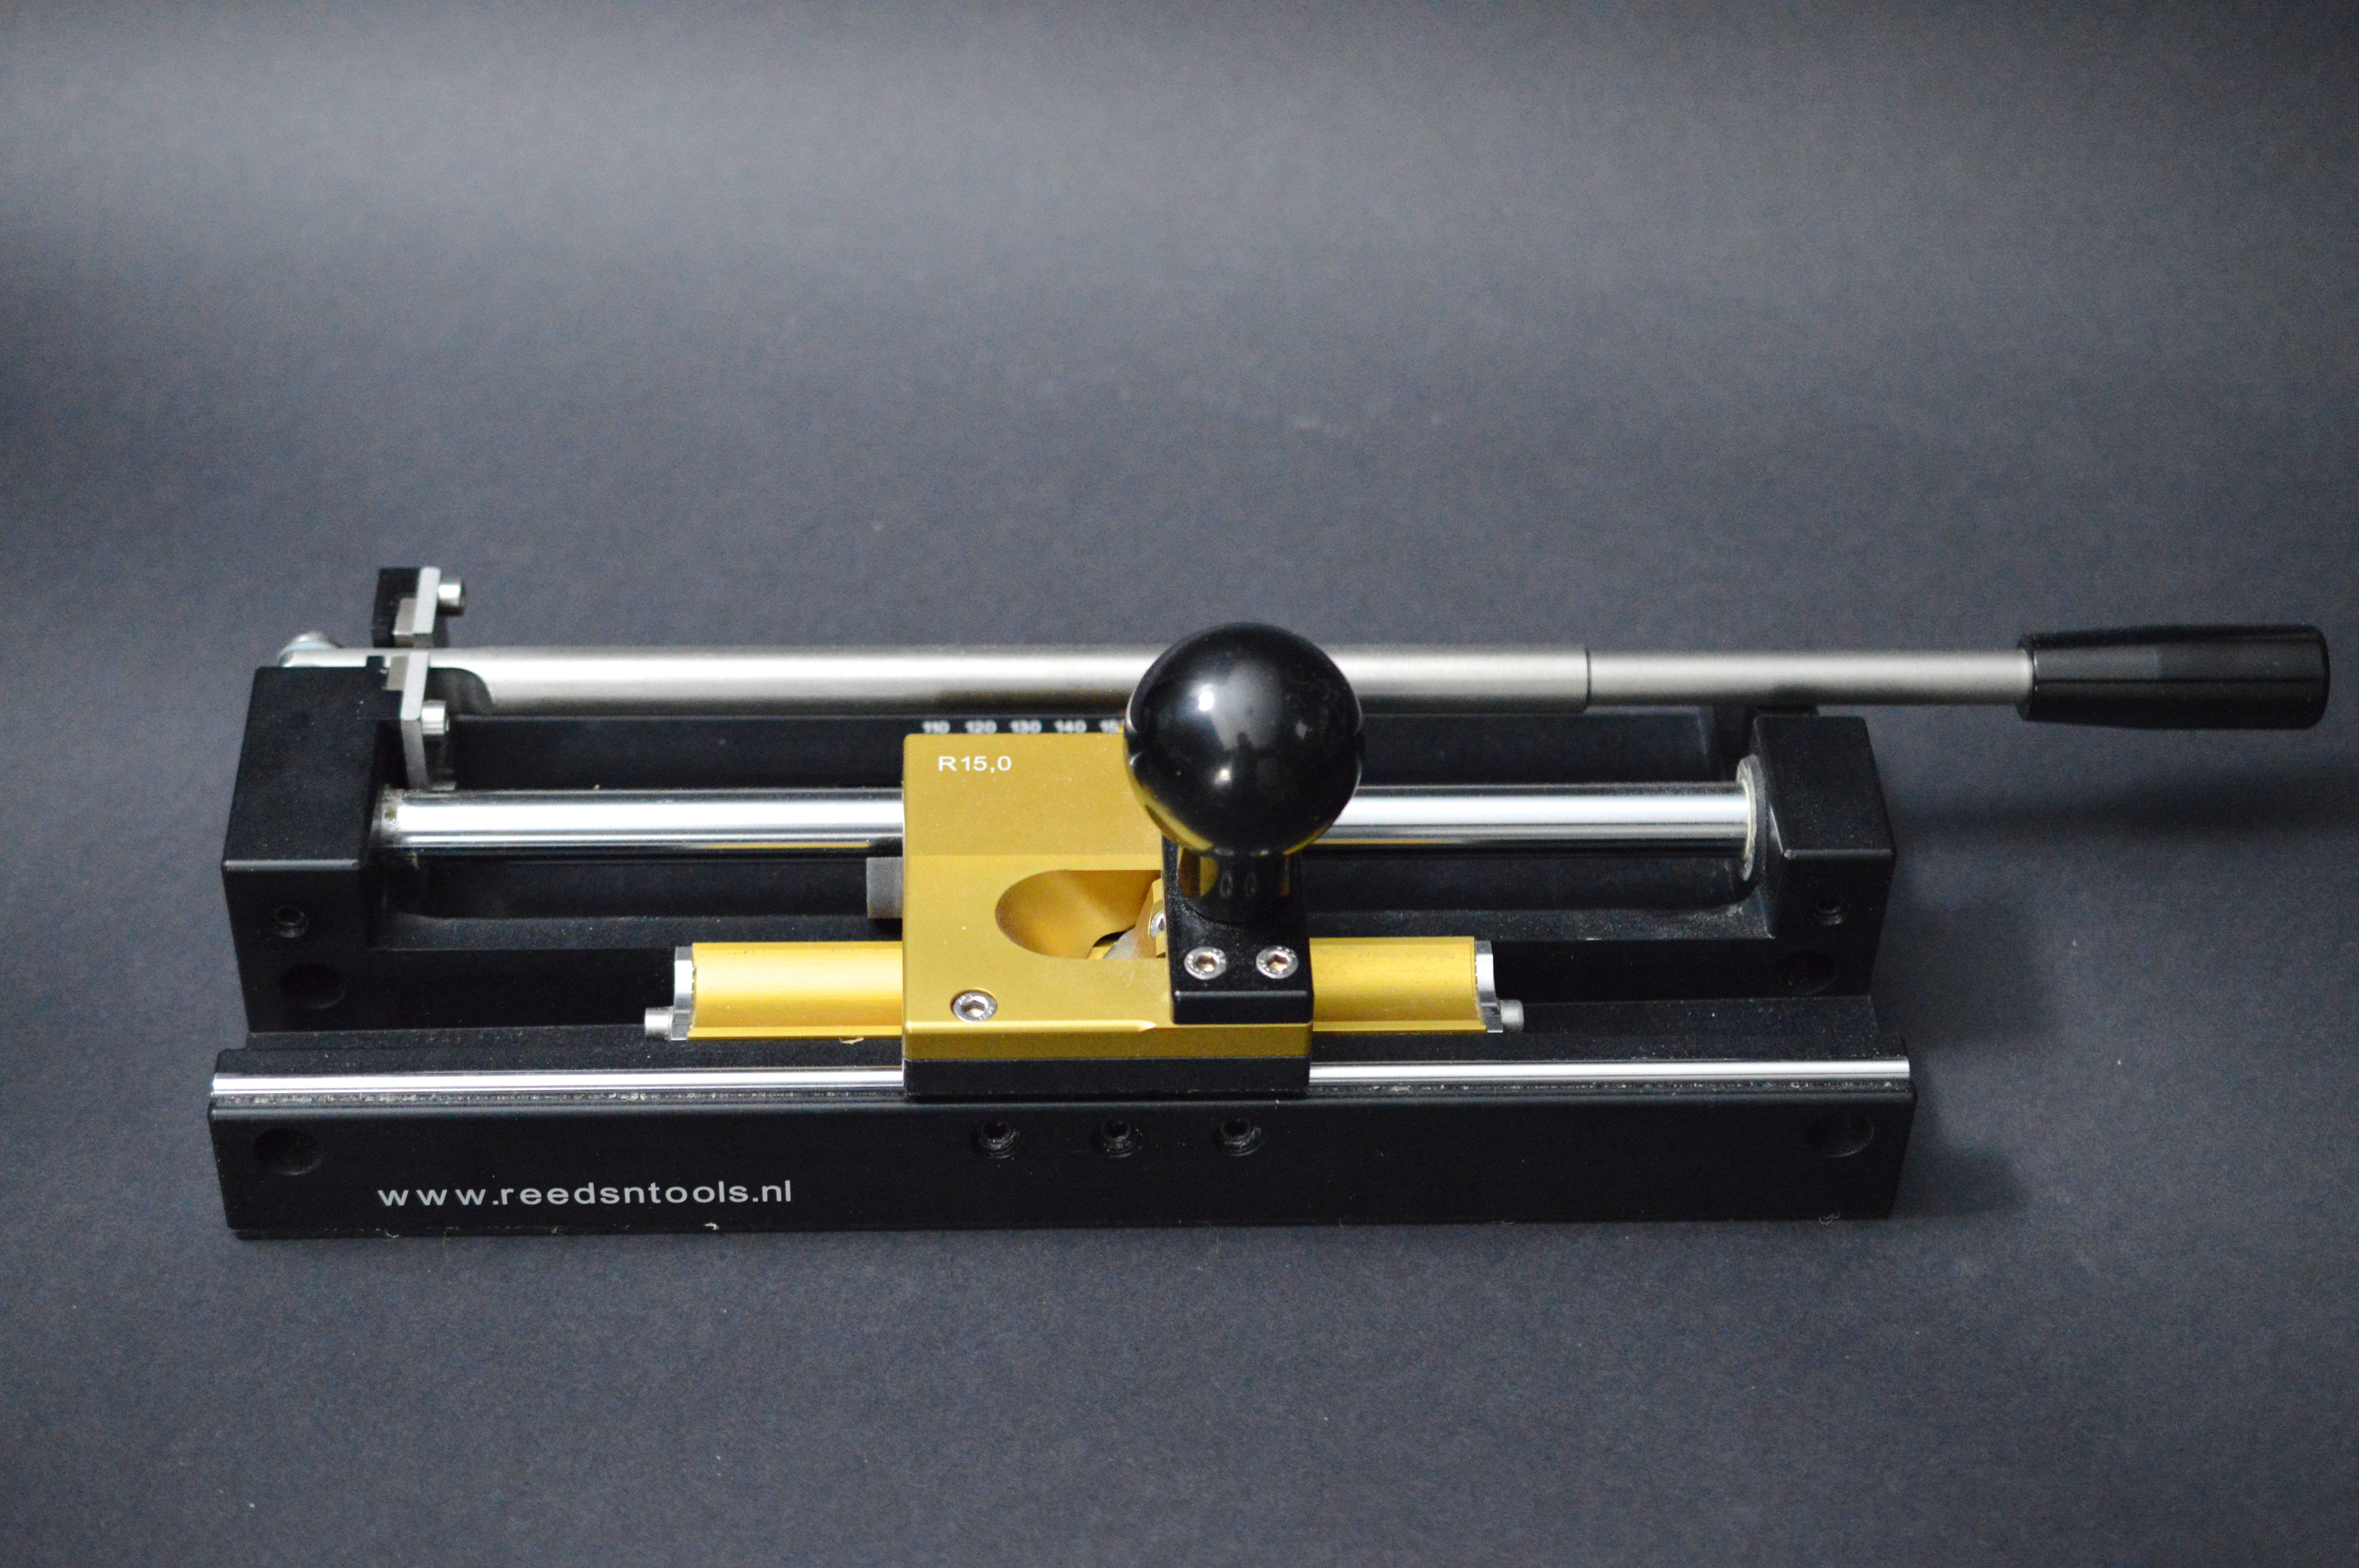
Reeds & Tools Profiler

contra profiler
contrabassoon contraforte profiler


contra profiler
contrabassoon contraforte profiler


This machine is a blast to use! So easy and fast. I have two scoring blades so I can score the collar and the center line of the cane. Chris van O’s was also nice enough to include a spare blade and a dial indicator for adjustments. Unlike my bassoon profiler, this machine has it all. I can accurately change my profile by hundredths of a millimeter by using the attachable micrometer…

contra profiler
contrabassoon contraforte profiler


This pair of machines make cane processing fast and accurate, and I would recommend them. So far Reeds & Tools is the only company making equipment for contraforte. The machines that I have are for cane up to 160mm in length but he is also making machines at 170mm and 180mm for contraforte player who want to experiment with longer tubes or blades.
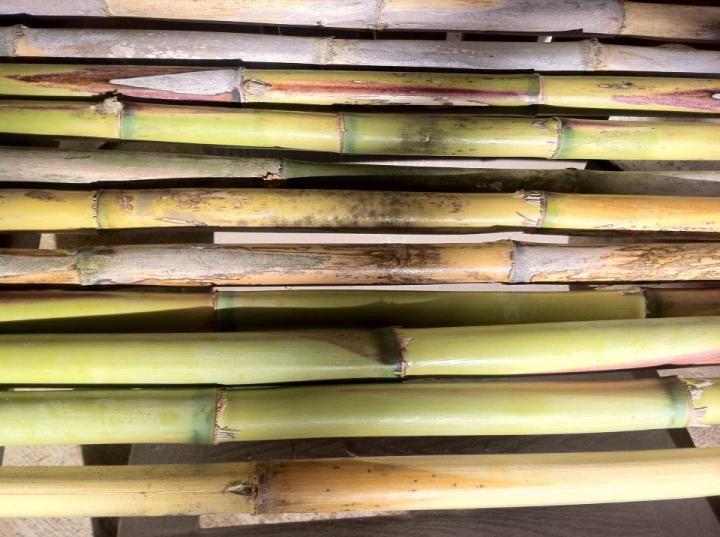
reedsntools.nl


Family


Two weeks ago I acquired a French Bassoon. It was found in a middle school’s band room cabinet and had been neglected for many years. There is no manufacturer’s mark, the usual branding spot is the low D guard and this one has been removed. My best guess is either Selmer or Buffet. Also, my time with this instrument hasn’t been true to the period since it lacks a french bocal. Initially I could hardly get any sound to come out of it, I realized that some of the pads near the top of the tenor joint were leaking. So I did a temporary fix by wrapping the pads in plumber’s tape.

The fingering schematic of the lowest tritone is completely different from the German system bassoon. Luckily the Weissenborn method book comes with a full french bassoon fingering chart. After a bit of work, the layout of the low keys makes sense and it is just as fast as the German system. The one consistent problem is the transition from D flat to E flat. The rest of the instrument is very similar to the German system with slight modifications, especially in the highest notes.

I did some research into french bassoon reeds to try and create something that would work well for this system. Most of what I saw was a narrower shape with a longer blade and tube. What I decided to do was to use my regular Fox 2 shaper which is a bit narrow and leave a long blade. I found some great french bassoon reed images on the International Double Reed Society’s website under the “Reed Project” tab. There are reeds gathered from top double reed players from all around the world. I’m not sure if this link inly works from member but here it is.

http://idrs2.colorado.edu/reed/Reeds.html

The tone of the French bassoon is more muffled and nasal. It really reminds me of baroque bassoon tone but with less stability. The instrument doesn’t project as well, it seems stuffy without any “sparkle” to the sound. Also the half step isn’t clearly defined for most of the notes. The pitch center of the basson is very flexible and is stabilized with modified fingerings to bring the pitch up or bring the pitch down. My goal for this instrument is to eventually play the Saint Saens sonata on it and Daphnis and Chloe suite 2.


inventory

Timing in reed making is essential in creating bassoon tone. Allowing rest between stages prevents the fibers of the cane from becoming stressed. It also seems in my experience that the longer the cane can rest, or the slower it is processed into a reed; the longer the reed lasts.This is especially true of reed blanks. Blanks are fully formed reeds that are still closed at the tip and have not been finished (above right).

So my process is something like this… Self harvested cane needs at least 6-8 months to fully dry out and stabilize. I put it in a big plastic storage bin without the lid and put it in the sun on sunny days.

Store bought tube cane that you split yourself should soak for at least 2 hours. Most people I know soak it over night, but it really just depends on how thick the cane is from that harvest. Just think that the water has to soak in to the very center of the cane so that the gouger doesn’t need to work so hard.

After gouging and profiling cane, I give it a few days to rest. This is the first big step for the cane and it has basically gone from a shoot of plant to a finely measured material. Depending on when I want to have new reeds I plan on letting this cane sit for 7 days, but if I am in a rush more like 4.

Gouged cane or gouged and profiled cane needs an hour to soak before working with it. Then I shape it, score it, fold it over, add a wire, and put it on a pressure peg. These pegs (pictured left) are removable and paired with a handle. Reeds are put on here and wrapped with rubber bands creating continuous pressure to form the tube. This rests for a full day (if you listen close you can hear the snap crackle pop)

Turning this into a blank is just adding two more wires, wrapping, reaming, and sealing. Blanks get better with time and for me I notice a big difference after 5 days of resting. This stabilizes the cane fibers and gives the blank time to acclimate. Also important in making reeds last longer is having multiple reeds to play in turns. Working with a batch of reeds in this way allows reeds to last for weeks instead of a few days.

There are some different techniques that I have read about in curing cane. I read an article in IDRS a few years ago from a bassoonist in texas. He soaks all of his cane in very strong tea. When cane is soaked the water becomes cloudy. These are little particle being stripped off of the fibers and released into the water. His theory was that by already having water fully saturated that it wouldn’t take so much out of the cane.

This is a great article from IDRS that touches a bit more on the preparation of cane in the early stages

https://www.idrs.org/publications/controlled/DR/JNL19/JNL19Cooper.pdf 

One thing that sets the bassoon apart from other members of the orchestra and even the woodwind family is the price of the instrument. I don’t know a single bassoonist who bought their own first professional instrument. It seems like bassoons are also becoming more expensive, I remember when i was in high school looking at a new Renard 240. 7 years ago they retailed for a little under $6,000, and now nearly $9,000.

I usually thought it was either market inflation or just greedy business owners, but now after having additions done to my own bassoon I can see the amount of work involved. I found a series of videos on youtube about the manufacturing of fox bassoons. This was a video put out by fox a few years ago and posted over a series of videos by someone online. Im sure if anyone had an interest they would already have found these anyways but here they are.

This is the second post from my recent cane harvest. I harvested a bunch of cane from the Ventura river and dried it out. Now it’s time to get to the rest of the cane processes.

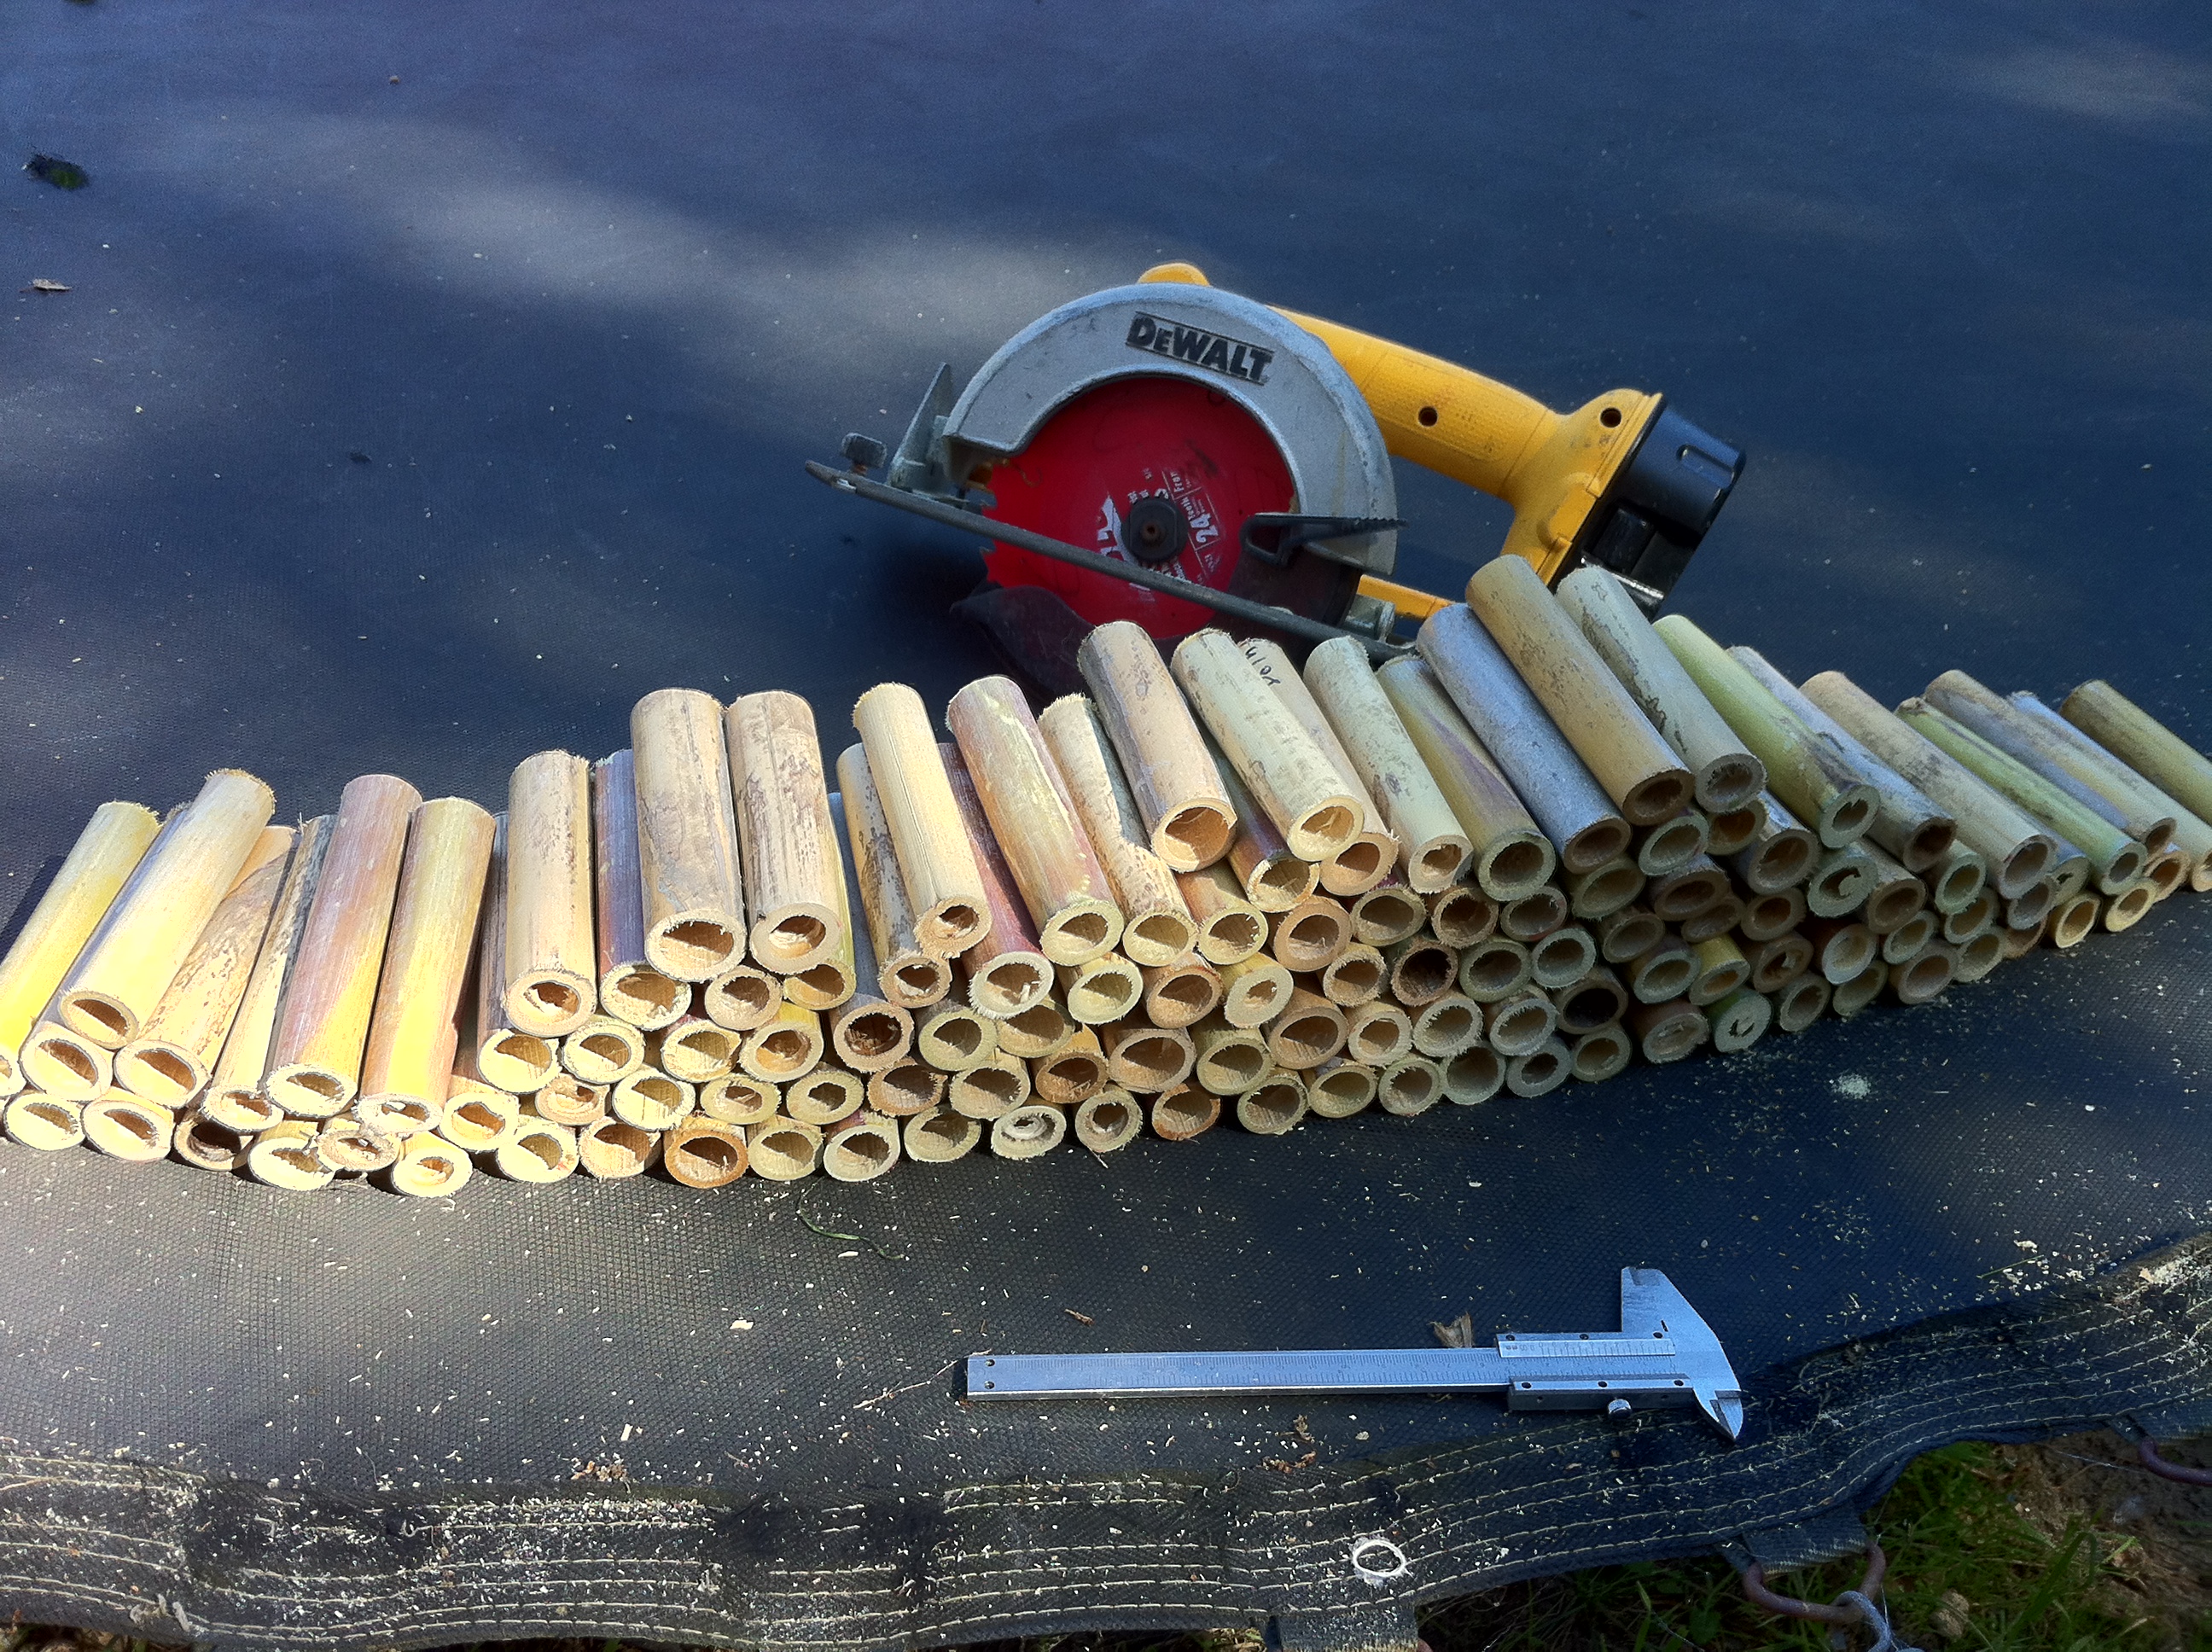
First I cut the “knuckles” out of the cane. These are the connecting sections of the cane that hold the shoots together. Since these knots are unusable it’s import to take them out without removing any extra cane, so I cut as close to the knots as I can.


Cane Cane


At this point all of the cane is free of the joints. This will help all of the sections of cane to dry more evenly. Some of the shoots were in the middle of a stalk of cane, and weren’t uniformly exposed to air.

Now with a caliper, I measure out every shoot of cane and mark the cut. I cut my cane to 120 millimeters because this fits all of my equipment. It’s important to keep in mind that cane continues to shrink as it dries out. So when cutting in the last few stages, its better to leave a millimeter or two extra.

IMG_4723


After all of the cane is cut to size, I store it vertically in a plastic bin. I leave the lid off and rotate it once a week since it is still drying out.

Home grown and harvested tube cane isn’t as pretty as store bought tube cane, but it cane be. Cane companies add a few extra steps like steam cleaning (which also sanitizes) they also sort out pieces with color variations. Home harvested cane isn’t quite as reliable as store bought cane either, not every piece cane be expected to become a good reed.

I have the great advantage of living by a field of naturally occurring Arundo Donax. My mother lives in Ventura, California and the Ventura river, from the Ojai river, is infested with an unending source of cane. The easiest place for me to collect this cane is where the river meets the Ocean. The is however a problem with this cane, since it grows basically on a beach, it is very weathered and dry. From what I have experienced so far, much of this damaged cane makes very soft reeds. The sun, sand, salt, wind, humidity, and temperature take much of nutrients from the cane and leave it very porous and soft. The best cane is in the middle of the fields, so it takes a bit of work to get to, but this cane is the most protected.

All of the pieces I have cut are in different phases of the drying process. I have read many articles about the drying process and what some of the big cane producers do. First I have read from two separate sources to harvest cane the day after a full moon. “the pitch is up” and something about the gravitational difference of having the moon high in the sky during the day pulls resources from the roots into the fibers. From there on the process is very different company to company. Most french companies keep the cane outside to dry in a “teepee” formation for a whole year. Where as the Rico company keeps the freshly harvested cane outside in the sun for 10 days and then moves it all into huge indoor storage facilities and large ventilator fans.

For my part I am going to harvest enough cane to allow me to try a number of different methods. Some I will leave outside, others will stay mostly inside, and others I might cut to shorter segments to see if it will dry faster. Most of the pieces I cut are 5-6 segments long and so ill have different sections of the same cane to work with.

Ill be sure to post pictures of the reeds made from this harvested cane!

481428_4644506303615_499657917_n

ive recently been buying Rieger cane. I buy it gouged and profiled, and i think that Rieger has set their profilers limits too narrow. That is, the distance between one collar and the other collar of unfolded cane is closer than what im used to. Now there is an immediate advantage to this, after forming the reed less material needs to be clipped from the tip in order to open the reed. That extra can length is instead now part of the tube. So the overall reed is longer despite where the tip is cut. For those players who are always sharp, this may be an answer. It can be as dramatic as choosing a longer bocal but instead having the ability to shorten it by reaming.