Last month I received my Bell bassoon! I had ordered it in fall of 2019 and Benson gave me the heads up that it was almost finished in February. I am VERY slow to learn new equipment and it takes me forever to get the muscle memory of new shaped keys into my technique. My experience with the new horn so far had been great and I have been playing it exclusively since it arrived. Now I wanted to play them both back and forth to get some sound/resonance comparisons. I found this really confusing because the keys are in different locations and so my Heckel playing suffered, but I think from the video you can get the sense of the differences. The playing experience is quite different, I can only really explain the Bell as being more “juicy” and the Heckel as “dry” I still have a lot of work to do to figure out the Bell further!

I wanted to attempt to make my own high note bocal by drilling an additional vent hole. I have seen some articles mentioning bore size and placement so I decided to go for it. I bought a Fox CVX 3 specifically to destroy and some heat shrink tubing. The drill  bit that I used is an Irwin #60, it is 1.02mm.

I drilled through the top of the bocal at both 20mm and  25mm from the tip. Then I set 2 pieces of heat shrink tubing to cover the holes.

This allows me to choose which vent to use and also how much of the vent to have uncovered. So far I have noticed that the vent closest to the reed helps with the notes above high F but the tenor register has an airy rasp to it. The vent farther from the reed helps with notes to high F with less distortion of tone.


With the shrink wrap tubing put in place, the bocal works like normal. So it can be used normally for a piece of music and a vent can be opened for the specific passage that requires it.

The standard range of the bassoon extends down to the Bb below bass clef, some pieces ask players to play an A below that. This is an on going subject that I don’t think I can fully cover here, but I can talk about my experiences so far!

The range of the bassoon listed on wikipedia indicates that Low A is an extended technique and possible with an extension. There are a few ways that the bassoon can play that Low A.

Multiphonic Fingerings exist that create loud/active sounds and colors on bassoon. There is a fingering that creates a sound similar to the Low A. The fingering is xxo/xxx F and there are others which can sort of sound like lower notes as well. To me this is not really a solution since the color of this multiphonic is so loud and rough it isn’t something that would just blend with the orchestra’s sound. I mention these fingerings to composers when I commission new music, but thats about it.

Low A Extensions are usually the way to get to that note, and we have options from cheap to expensive. Cardboard paper towel roll fits in the bassoon bell so that can be cut to length to be an in tune low A. There are commercial versions of this made from plastic (looks better) which comes with a felt ring to adjust how far it extends, which gets that same effect. I have heard in some specific cases like the Nielsen woodwind quintet that a bassoonist uses the English Horn’s bell, which sounds like a complete invasion of personal space. There are nicer custom made maple extensions out there too, which look the best.

Adding a Low A extension to the bassoon creates issues. To use the extension to play an A mean that we finger the low Bb and the A comes out, which means that we can no longer play Bb. The extension also interferes with the taper of the bore. The bore of the bassoon is never stagnant, its always expanding or diminishing and so to put in a straight tube changes the final taper of the instrument’s length. That creates a whole series of acoustical issues that affects the projection and intonation across all of the bassoon’s range not just the low notes. Since it’s such an acoustic issue to have the extension in, we just put it in for the exact passage it’s needed and then take it out. So all of that being said using an extension for Low A is very tricky and used on a case by case basis. Sometimes players will bring the note or whole passage up an octave, some players are die hard purists that the low A must be played, some players don’t own an extension and never bother with it. It’s awkward to put in and out quickly and it makes the bassoon sound wonky when it’s in.

Magical Chromatic Low A Extension should be a massed produced item by now! This extension made by Benson Bell in the 1980’s, he made a set of 4 that were exactly matched to the bassoons owned by the players of the Toronto Symphony. When Steven Braunstein left and went to San Francisco the extension went with him because it was custom sized and fitted to just his bassoon. Now the placement of this extension is different, this doesn’t go onto the end of the bassoon bell but it goes between the long joint and bell.

This extension is unique in that it doesn’t require any addition keywork added to the bassoon. Also unique in that it is fully chromatic, and so we can play Low A and the Bb. The operation is easy, push the Bb key halfway down for Bb and all the way down for A. This exact style of extension would not work for a gentlemen cut bassoon but a mechanism could probably be designed for that.

It is a big step up from the inserted extension but it still creates intonation and projection issues throughout the range. It is still interrupting the bore and the way the instrument was voiced. However this makes many more Low A circumstances possible. Such as this passage from the Tomasi Trombone Concerto

This would be normally unplayable since having a basic tube extension in means the Bb would sound as an A, and I can’t put in and take out the extension for just one note while playing. This is an example where the player either plays it all up an octave or doesn’t play the A.

Low A Bells are the most expensive option and someone has to think about how often they play Low A, and is it worth the price.

Having a Low A bell built is typically done when initially ordering a new instrument.

The Low A on these bells is operated with keywork that is permanently attached to the bassoon. This is either a touch piece on the right side of the low Bb key or as a larger key below the low C# key. Having it below the C# key would interfere with the pinky whisper key. The Low A bells still suffer from the acoustic deficiencies of tweaking with the bore. To really have a low A instrument built it would require a re-designed long joint and bell.

I don’t know why bassoon bottoms out at Bb. It historically always has, but with most orchestral works being in sharp key signatures, it seems like A would be more useful. The need to play A’s began with Wagner, Strauss, and Mahler and now still comes up in new pieces. It would be great if a bassoon manufacturer would mass produce some chromatic extensions!

Last summer I had time to send my bassoon in to get replated. When I bought it, I really liked the sound and response but it felt physically rough to play and some of the keys had pitting.

I sent my bassoon to Chad Taylor in Illinois and he ended up removing the plating himself. He then sent the instrument’s keys and metal bands out to be worked on.

After getting the keyword back he repadded the bassoon and redid all of the bumpers, corks, and felts. It took him a few months to do the whole project, but it ended up looking and feeling much better. Contact Chad about bassoon repair at chadtaylorwoodwinds.com

This week I had a few Leitzinger Contrabassoon Bocals on trial from Forrests Music. I had a Leitzinger NML2 bassoon bocal  a few years ago when I played on a Fox 601, but I sold it since it didn’t pair so well on my Heckel 10k. What I so appreciated about that bocal was the easy high note response and clarity in the tone. That bassoon had some funny pitch issues (saggy middle E) that the Leitzinger fixed immediately.

I have been using a Heckel C2 that suits the instrument well, so trying new bocals is just out of curiosity. Forrests has a large selection of Leitzinger contra bocals so I got to try each type and plating option, I ended up really liking a F2 Gold plated and an F2 platinum. Now that I have had them at home for a few days I have a sense of what these are able to do.

I notice almost no difference in response, pitch, or tone from the Heckel and the high notes are just as solid. The one improvement I do notice is when I use a light reed and play loud sfz attacks sometimes the pitch can sag with the Heckel, and the Leitzinger is more stable. However I do not like the bend, it angles down much more than I would like which forces me to change the instrument position. And lastly the price point is high. This thing comes in at $2,300 which is much more than a new Heckel bocal, without a huge sound difference. I am impressed by the sound and quality of this bocal but it’s a little too much for me!

A few months ago I worked on a project that required a romantic era contrabassoon! The basis of the project was to track the development of the contra over time and play some of the music written for each instrument.

Here in the Bay Area we are very lucky to have David Granger who is a period bassoon expert. And he was generous enough to let me use one of his period contras for this project.

Romantic Contrabassoon

Although I ended up getting in a few practice sessions on it; I found that I’m not a great period player, and this instrument has much more potential than what I could perform. I was able to play some Beethoven and Brahms on it but I never was able to get a high Ab which is in Brahms’ 3rd Symphony.

Romantic Contrabassoon Bocal

Both of David’s period contrabassoons were made by Wolf in the style of the Viennese contras. This is a unique instrument because it can be tuned to A=415 or 440 with the use of two different lengths of bocals. The bocal looks similar to a bassoon bocal but has a drain and is upside down when assembled with the crook.

Romantic Contrabassoon Bocal

When I practiced different instruments in the same practice session I was getting frustrated with the Romantic instrument. I liked it on its own, but if I played a modern instrument and switched back to romantic then it seemed so unstable and difficult to play. Period bassoons in general have a less focused sound, and so I’ve never gotten into performing on them.

Bassoon Contraforte Contrabassoon Romantic Contrabassoon

The reeds here are supplied by Wolf and were made by Stefan Pantzier I tried my hand at making a few and they turned out okay. The shape is similar in dimensions to the Contraforte C2 shape but with a shorter tube. The thing I didn’t try was adjusting the gouge to something more appropriate to the era. In the time before gouging machines people gouged by hand and purposefully gouged the center thinner. This meant less work had to be done in profiling and finishing a blank.

Romantic Contrabassoon Reeds

Contrabassoon Contraforte Romantic Contrabassoon

Ortwein Balance Hanger

Back when I played on my Fox 601 I relied on my Fox balance hanger to take some of the stress off of my left forearm. But the Fox balance hanger only fits Fox bassoons, and so now on my Heckel my old one doesn’t fit.

I just found a balance hanger made by Mark Ortwein which fits Heckel bassoons. I’ve been using it for two weeks now and it has made my bassoon lighter on my left hand. This bassoon is heavier than my last one so that’s really a big help.

These can be found at ortweinwoodwinds.com

Heckel 5751

This week I had Heckel 5751 on trial from RDG woodwinds. This bassoon was made in 1922 and has been modernized with a high D key, E key, rollers, and tone hole inserts. The stain and lacquer is in amazing condition, maybe part of the restoration.

Heckel 5751

The new keys have been added in a tasteful way and the key casts match the originals. However this bassoon still has the original ivory bell which makes it difficult to travel with.

Heckel 5751

This bassoon has a lovely sparkling voice and is still available at RDG

Heckel 5751
Heckel 5751

Heckel 5751

Heckel 5751

This is the second post from my recent cane harvest. I harvested a bunch of cane from the Ventura river and dried it out. Now it’s time to get to the rest of the cane processes.

First I cut the “knuckles” out of the cane. These are the connecting sections of the cane that hold the shoots together. Since these knots are unusable it’s import to take them out without removing any extra cane, so I cut as close to the knots as I can.


Cane Cane


At this point all of the cane is free of the joints. This will help all of the sections of cane to dry more evenly. Some of the shoots were in the middle of a stalk of cane, and weren’t uniformly exposed to air.

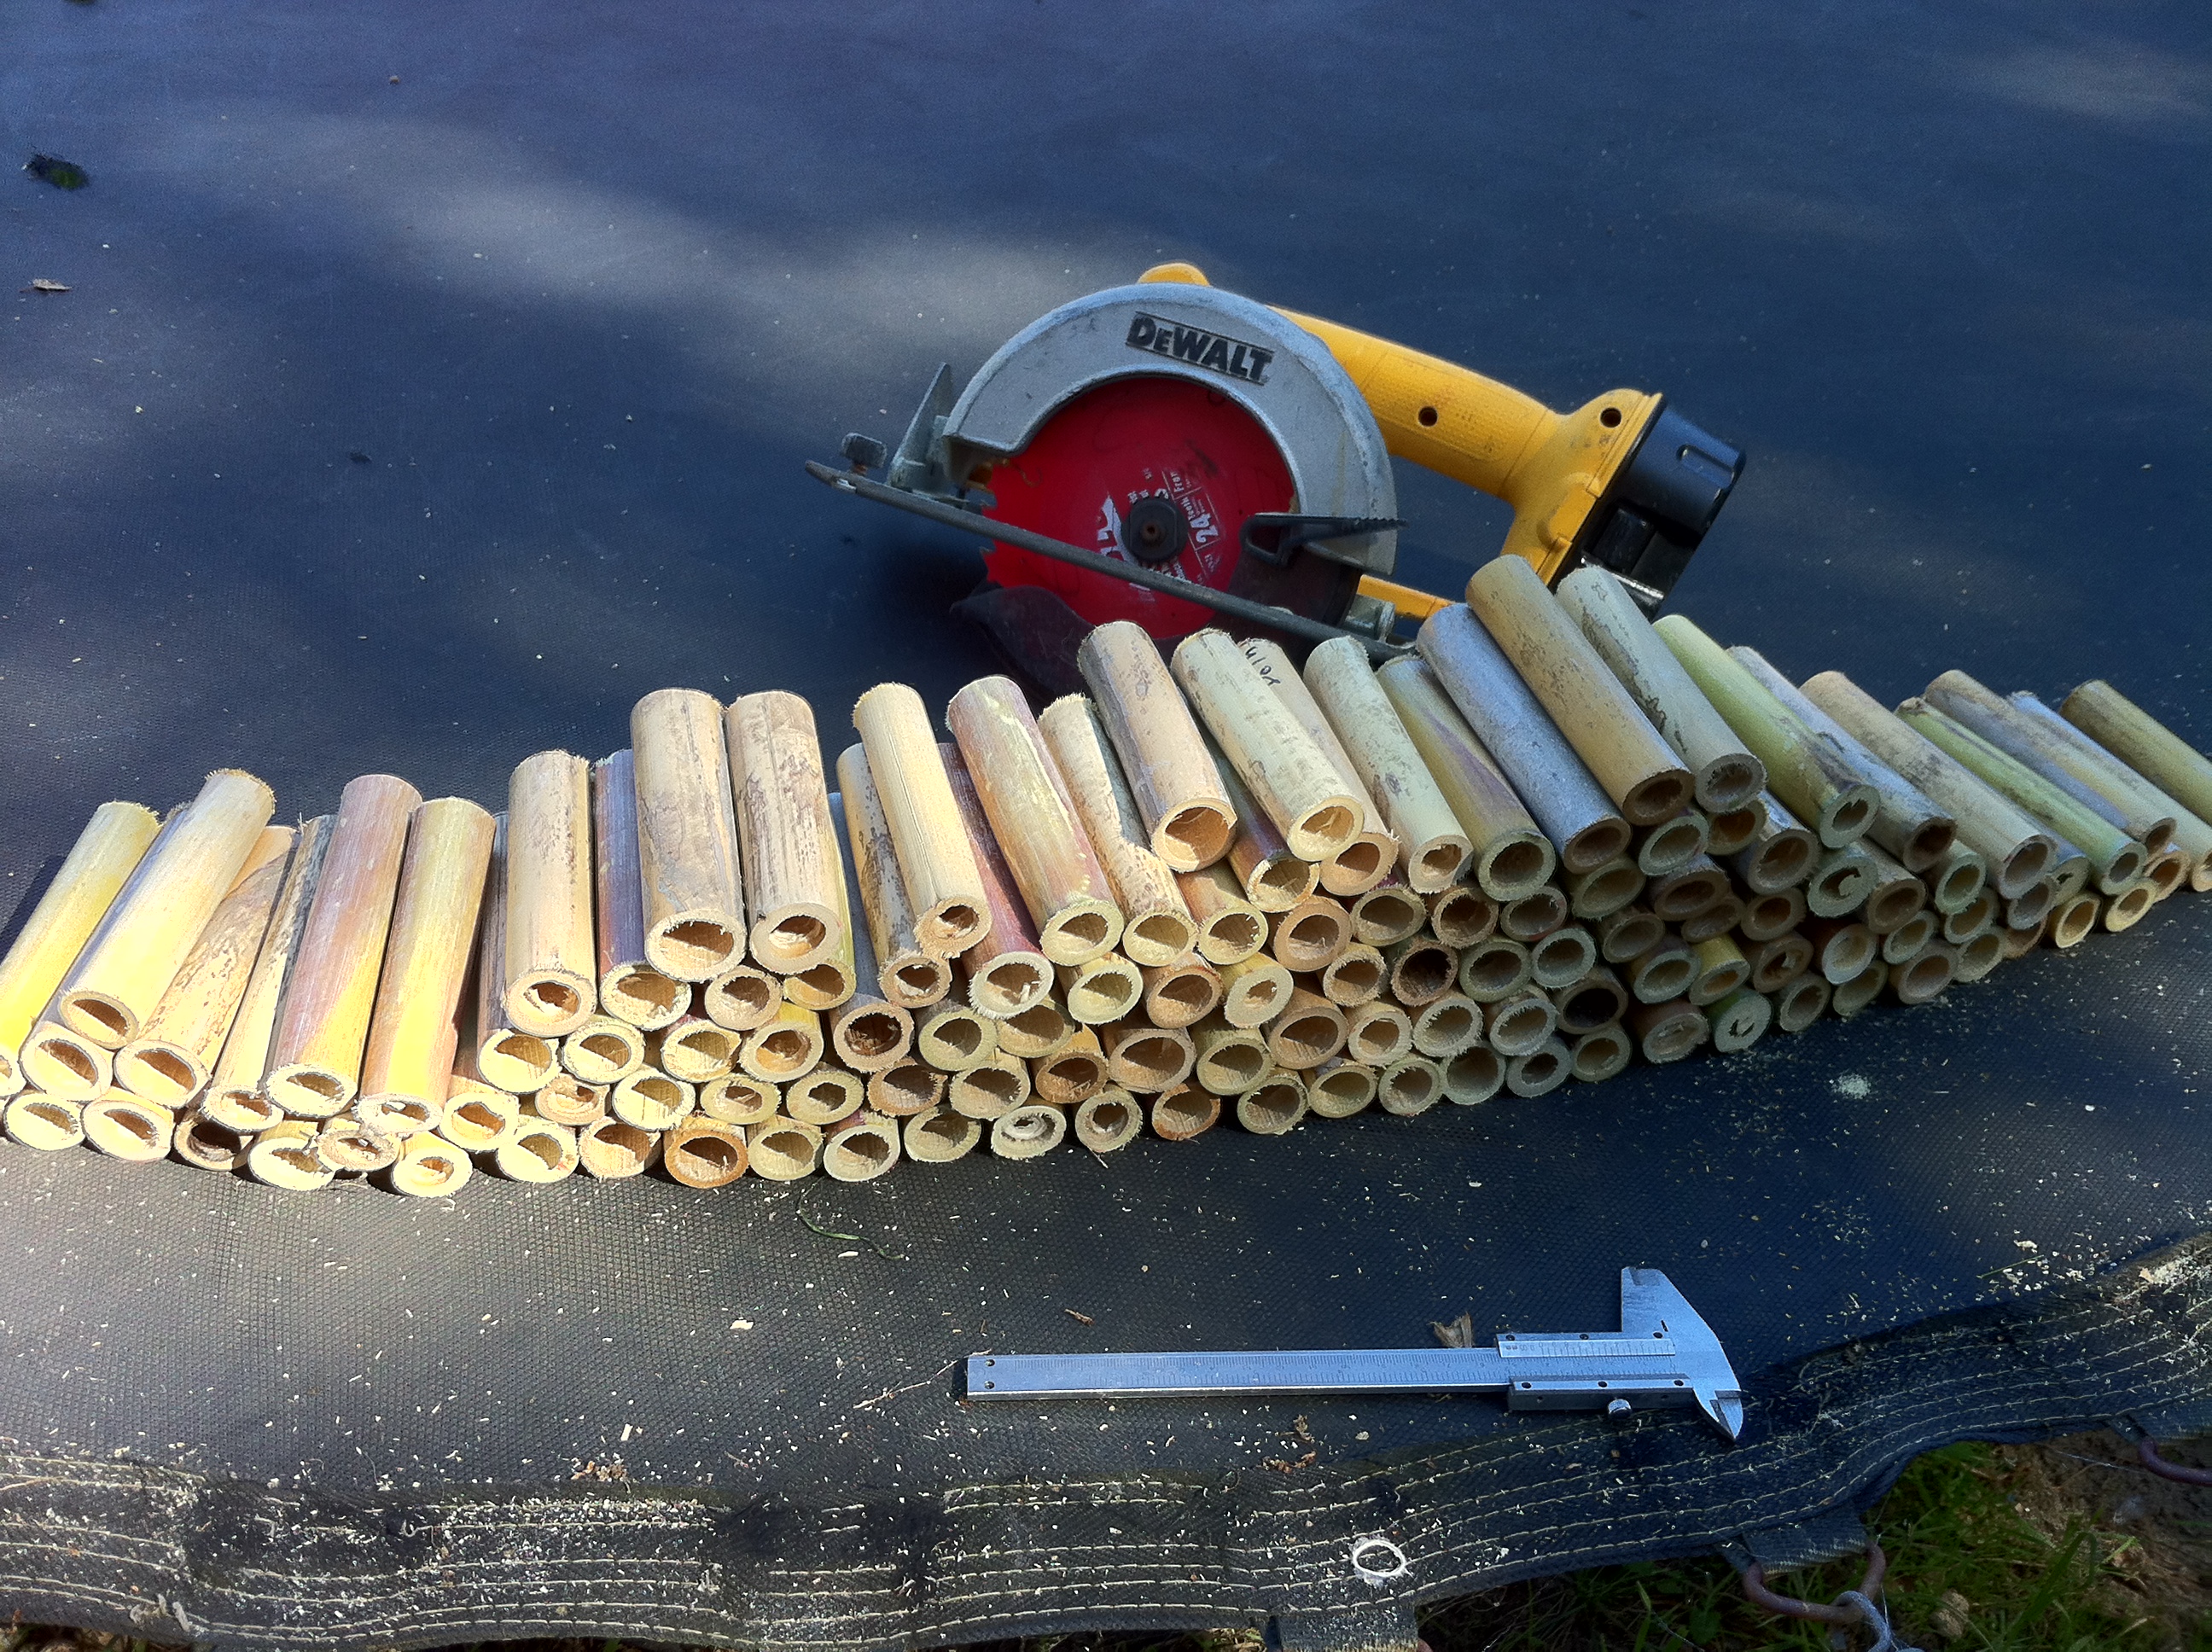
Now with a caliper, I measure out every shoot of cane and mark the cut. I cut my cane to 120 millimeters because this fits all of my equipment. It’s important to keep in mind that cane continues to shrink as it dries out. So when cutting in the last few stages, its better to leave a millimeter or two extra.

IMG_4723


After all of the cane is cut to size, I store it vertically in a plastic bin. I leave the lid off and rotate it once a week since it is still drying out.

Home grown and harvested tube cane isn’t as pretty as store bought tube cane, but it cane be. Cane companies add a few extra steps like steam cleaning (which also sanitizes) they also sort out pieces with color variations. Home harvested cane isn’t quite as reliable as store bought cane either, not every piece cane be expected to become a good reed.