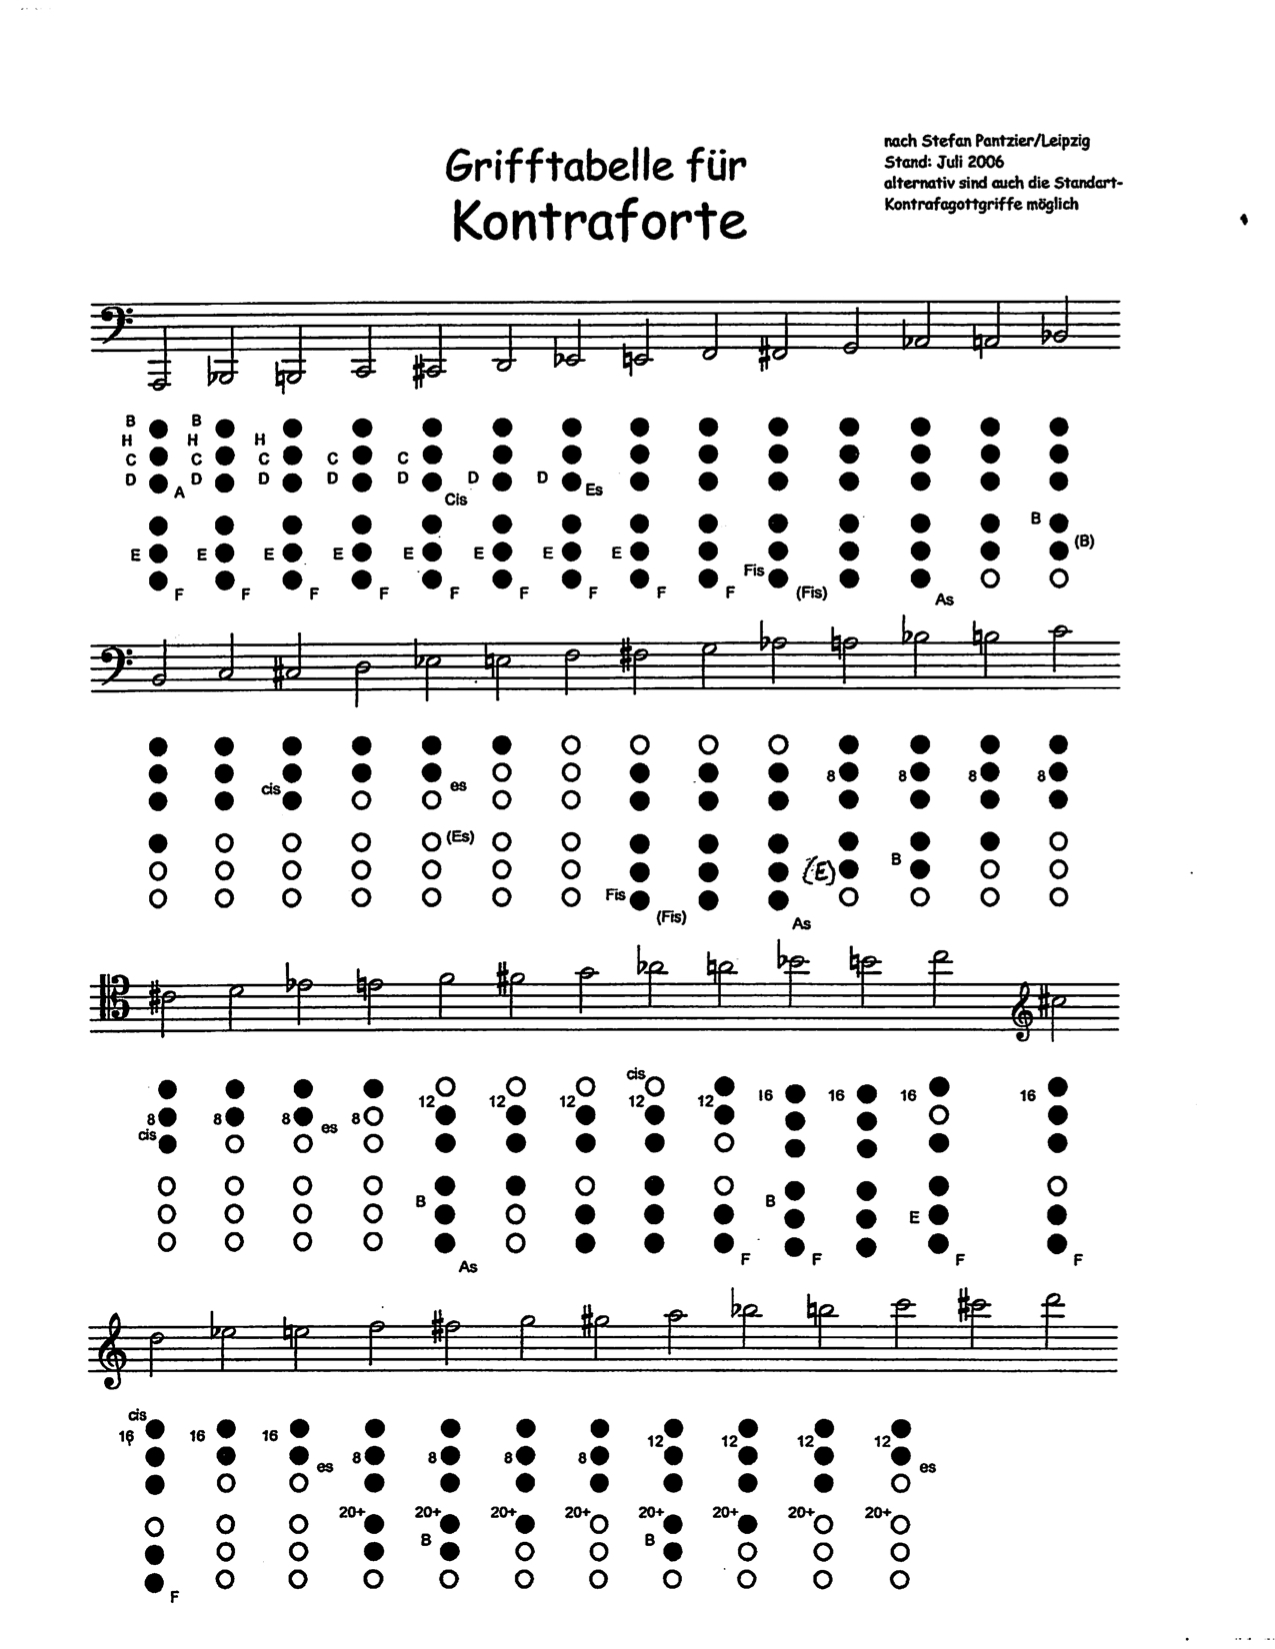
kontraforte
Thomas Adès and the San Francisco Symphony

This weekend (March 5,6,7) Thomas Adès with be conducting his own composition with the San Francisco Symphony. His piece “In Seven Days” is based on the seven days of creation outlined in the book of Genesis. It is a multimedia piece including video projection and he scored it using a contraforte!
Bay area people should all go and hear some contraforte in Davies hall!
SF Symphony Tickets
This is the first time that contraforte has been used in the San Francisco Symphony and it will be performed by Steven Braunstein.

 Here I am visiting the Contraforte tamer
Green Reed!?

I tried an experiment last week involving a Green Reed for Contraforte. I just harvested some cane in early January and decided to try to immediately make a reed out of it instead of letting it dry. And this is what turned out! I regular reed that sounded and acted like any other reed but it was fresh green cane and didnt need to be soaked in water before I played on it. The texture was similar to a very hard piece of cane so I had to make this thinner than I would normally. After a few days it started to dry out and warp and is now is playing very sharp. Next I’m going to try this on regular bassoon.
I would suggest trying it to all of the cane harvesters out there!
Standing Peg for Contrabassoon, Contraforte, Bass Clarinet

I have been jealous of bass clarinet players and contrabass flute players who are able to perform standing. It adds to the stage presence for certain pieces and is more visually interesting to watch.
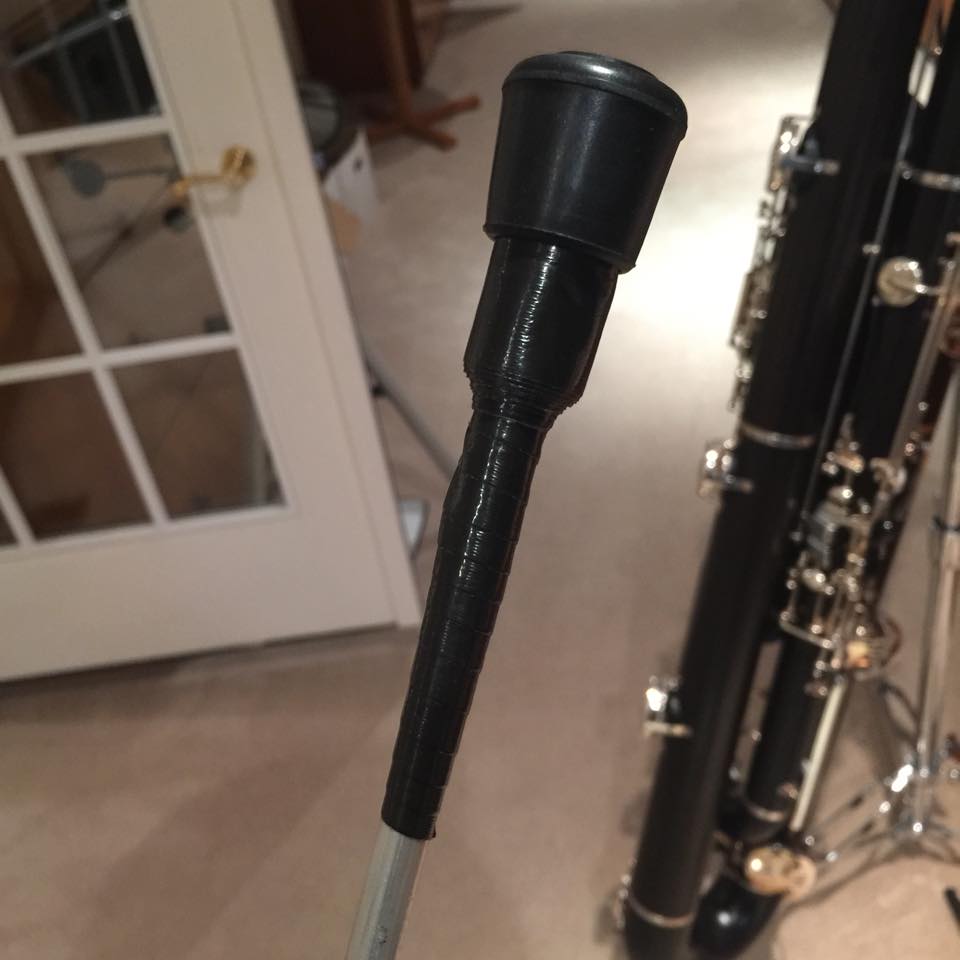
The parts that I used to make this standing peg cost under $10 and I bought it all at Home Depot.

For the Contraforte, the peg used is 3/8 inch so it was easy to find a match. I used an aluminum rod since it aluminum is easier to cut. I have my cordless reciprocating saw, Peg stock, black Duct Tape, a Rubber stopper. After cutting the peg to length based on my height, I wrapped the tape around an end to fit the rubber stop.
Reed Machines
This is a post that I have dreaded doing for a long time. I debated whether this was necessary and useful to people, or if it would just be obnoxious. I realized that when I myself was buying reed tools there was very little information on a consumer level about how these machines stacked up against each other. If I was starting all over again in buying reed machines, I would have liked to have seen more information about them. So that’s the basis of including this aspect of my reed desk equipment.
Reiger Bassoon Gouger


This gouger was a recent acquisition, it was a graduation gift from my uncle. Outside of this gouger I have only used the Reeds ‘n Stuff gouger, and I do really prefer the Reiger. The guillotine (which is included, and a big reason for choosing this machine) is very easy to use and cuts to a perfect fit to the cane bed. Once the cane is at that 120mm length, it fits right into the cane bed and never slips out. I have had some problems with other gougers where the cane jumps off of the machine once you use a little strength.
Berdon Bassoon Profile


This machine is an ANTIQUE! It is very old and I found it on eBay from an oboe player who had it in his closet for a few decades. This machine represents a very simple single barrel profiler with two basic adjustment screws, a removable blade, and no measurement systems whatsoever. There are many simple machines like this still being done by a few companies. What I like is that it is very easy to use, easy to remove the blade to sharpen myself and easy to adjust. I don’t like that when I adjust the profile I have to waste a few pieces of cane on trial and error experiments with no way of knowing what my current settings are. I found this for $300 and it works great, if you can find a cheap simple profiler you can probably get a good blade fit to it and get it working. Otherwise I would suggest finding something newer and more sophisticated.
Reeds ‘n Stuff Tip Profiler


This tip profiler I also found used. This is the only thing that I own by Reeds ‘n Stuff and I’m quite sure that he now makes a fancier version of this. However this is very similar to the Reiger tip profiler and it makes all reed finishing a dream. Every tip is the same every time. I cannot enough stress how much this machine changed my reed making and my consistency of sound. I know that they also make oboe tip profilers, that is most of what I hear oboe reed makers complain about is creating an even tip. I have also had some luck using this with contrabassoon reeds without even having to adjust it. If I just put the reed on and keep it a few millimeters shy of the guideline, I get a great tip.
Reeds & Tools gouger
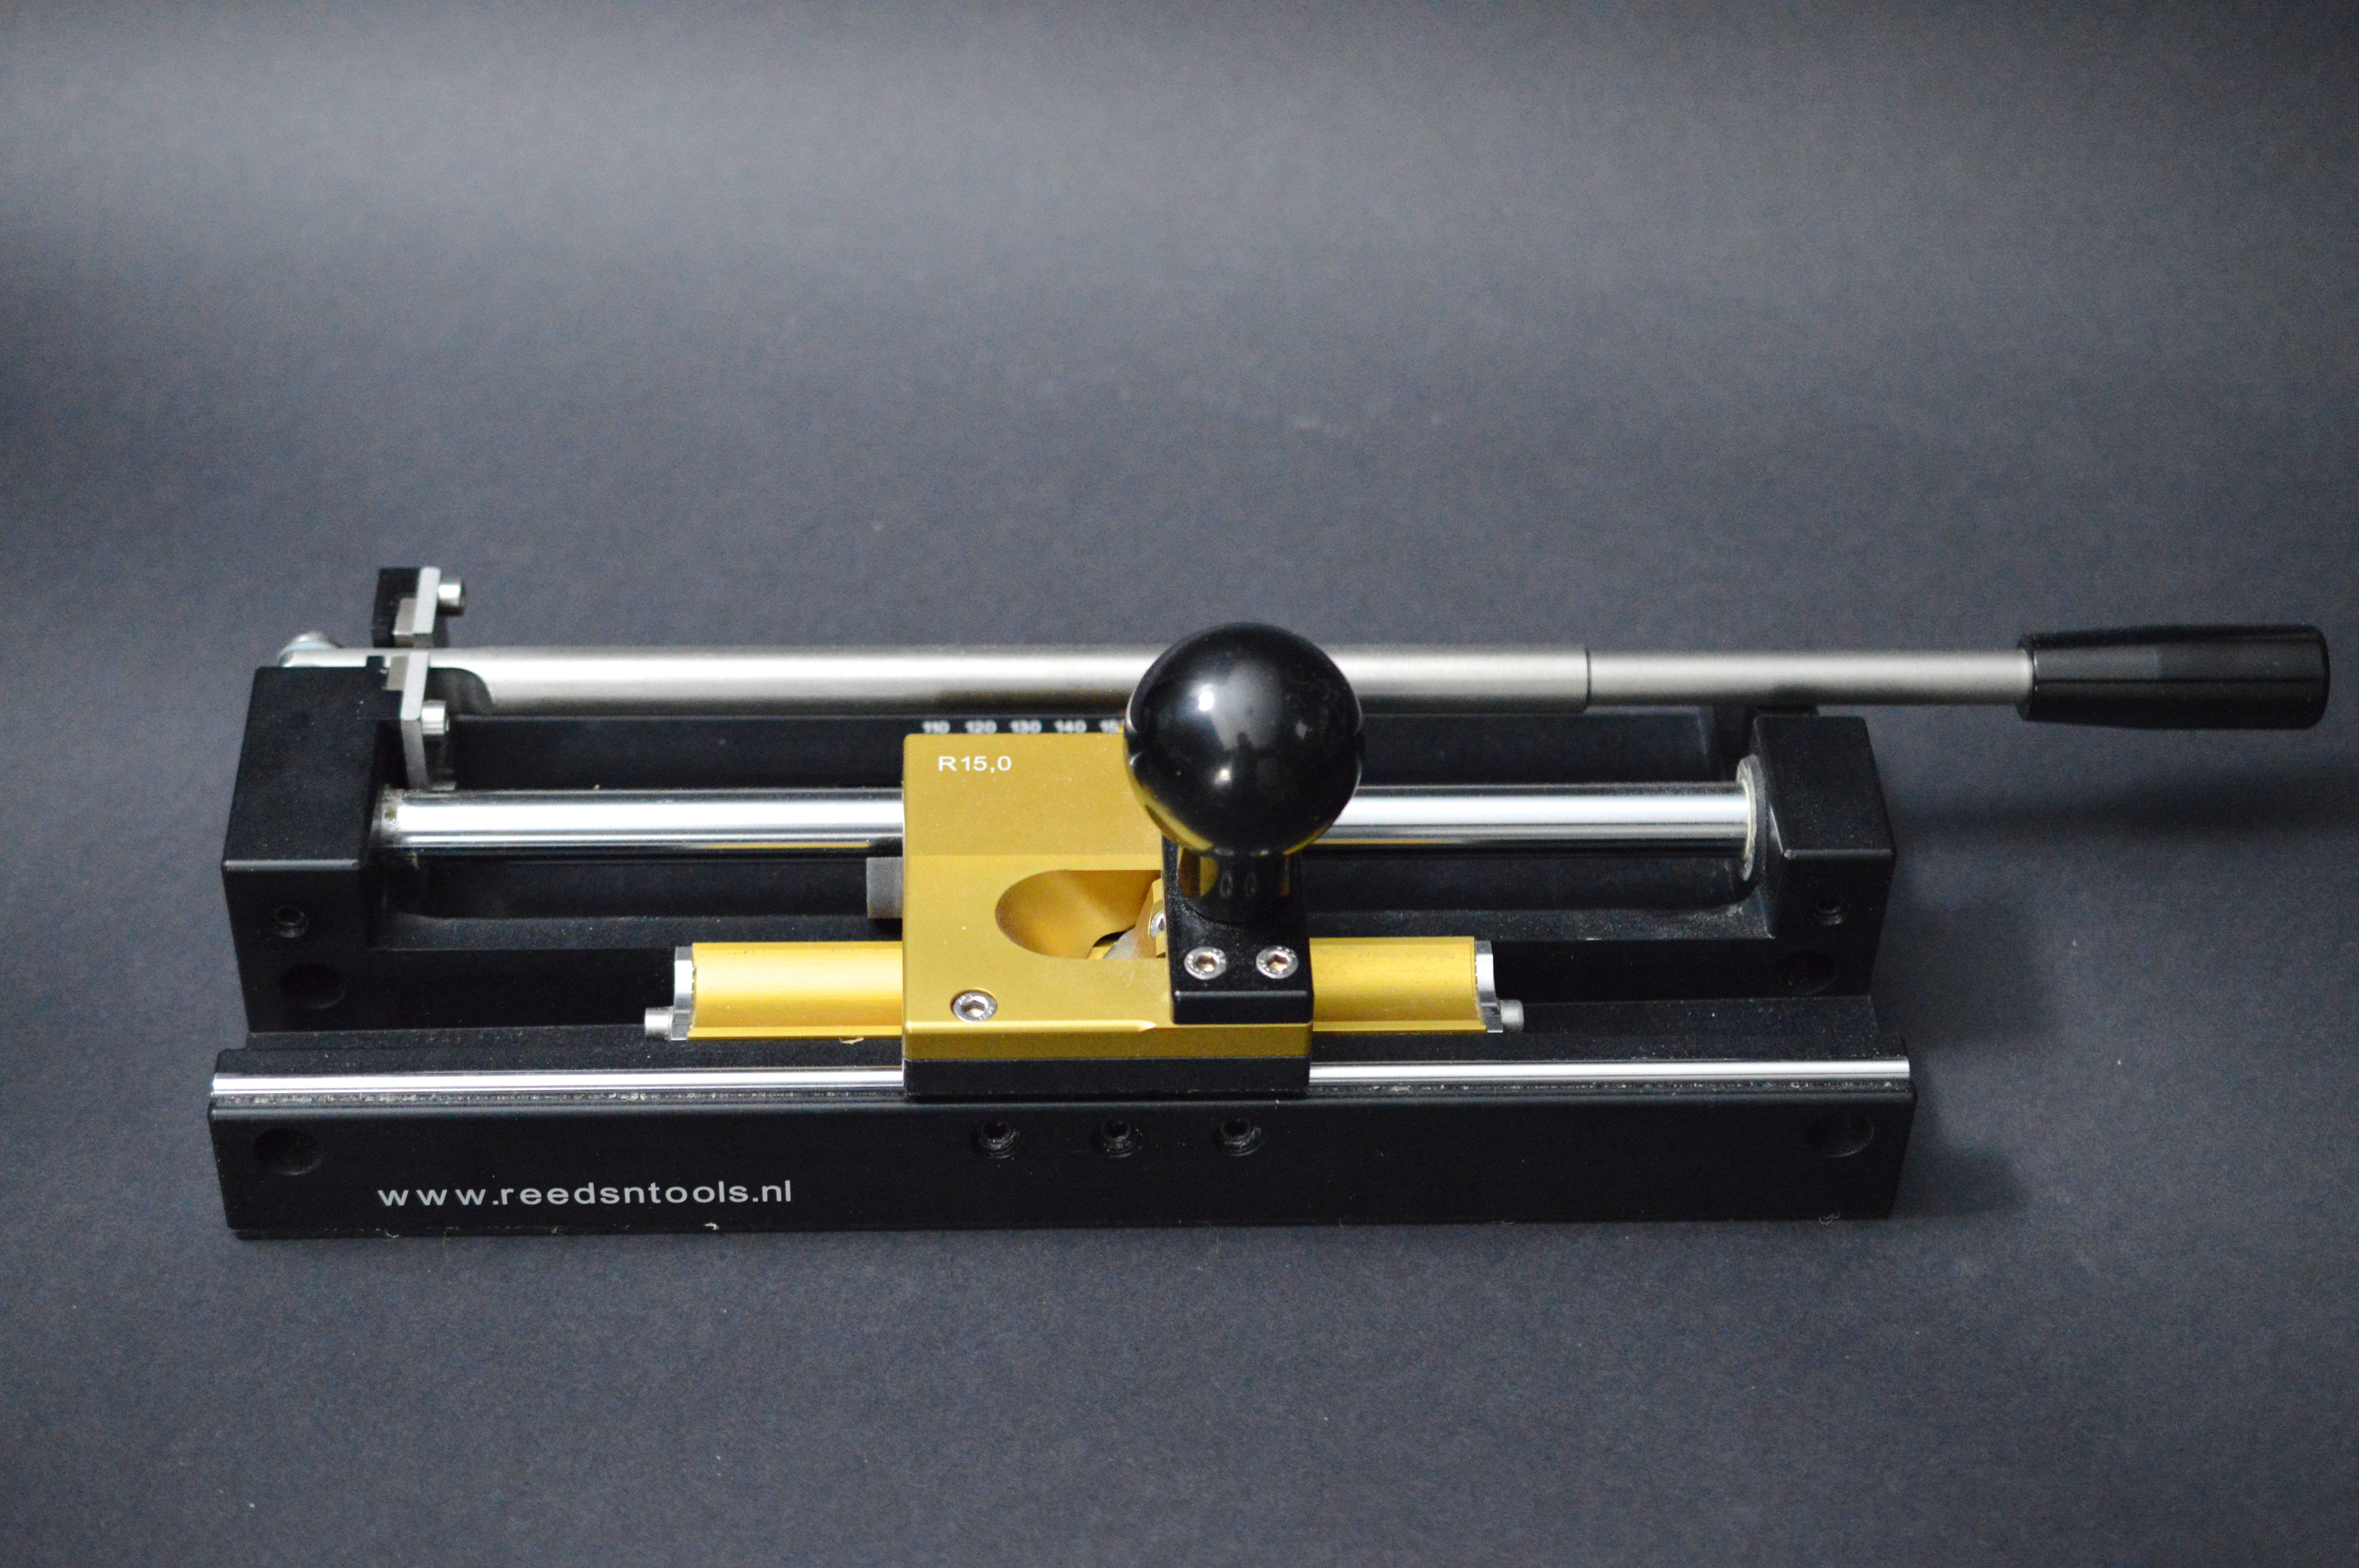

These Reeds & Tools machines are my newest additions, just over a month old. They represent the fanciest machines with flexibility and technology and controlled results. The gouger I currently have set up for processing contraforte cane, this means that I am using a 160mm long 30mm diameter cane bed with a 30mm diameter blade. The cane beds on this machine are interchangeable, so I also have a contrabassoon length bed (150mm) that I can slide use. I also have a 28mm diameter blade and carriage If I want to have eccentrically gouged cane instead of concentric. This machine can also fit a bassoon cane bed, so for doublers who only want one machine to process both instruments’ cane this may be a good choice. Again the guillotine has been great and the bed hold cane firmly.

This is an example of the gouge from this machine.
Reeds & Tools Profiler

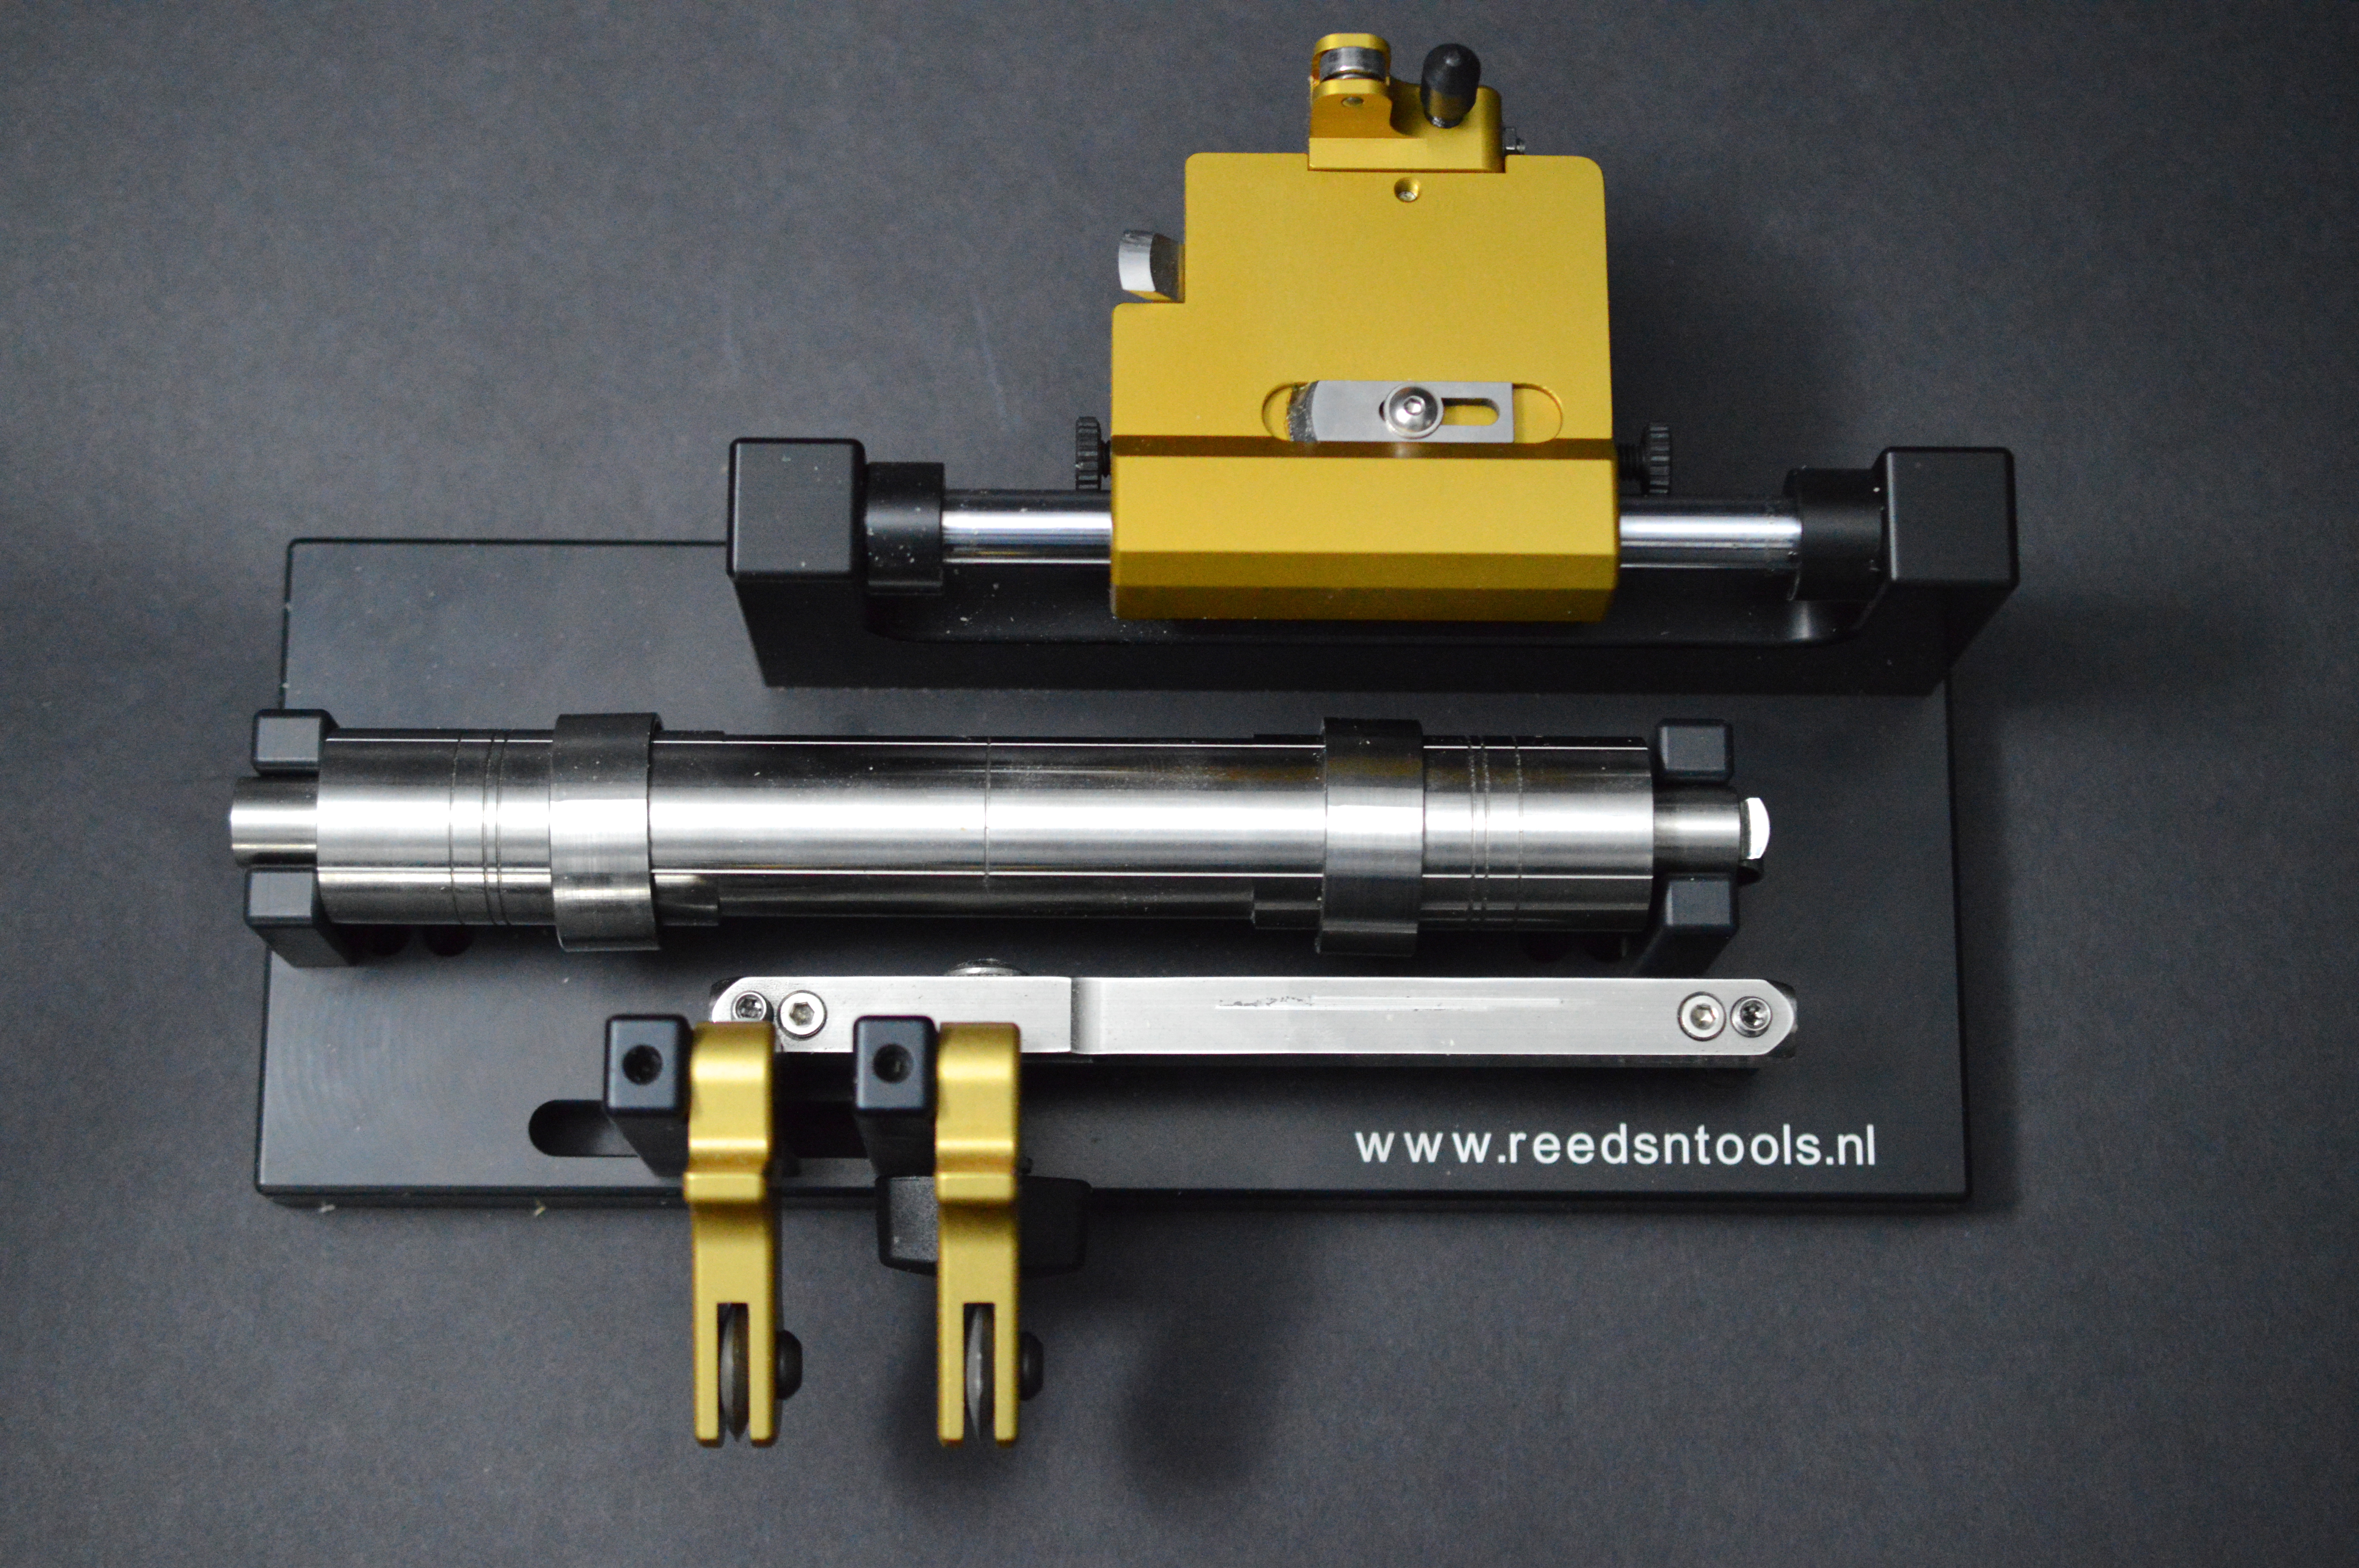
This machine is a blast to use! So easy and fast. I have two scoring blades so I can score the collar and the center line of the cane. Chris van O’s was also nice enough to include a spare blade and a dial indicator for adjustments. Unlike my bassoon profiler, this machine has it all. I can accurately change my profile by hundredths of a millimeter by using the attachable micrometer…

This pair of machines make cane processing fast and accurate, and I would recommend them. So far Reeds & Tools is the only company making equipment for contraforte. The machines that I have are for cane up to 160mm in length but he is also making machines at 170mm and 180mm for contraforte player who want to experiment with longer tubes or blades.